
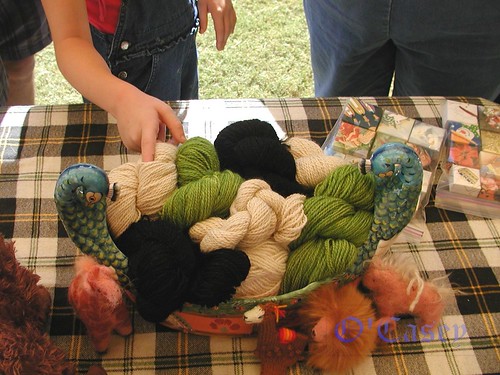
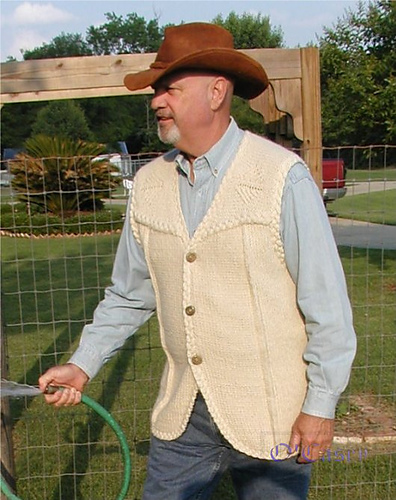
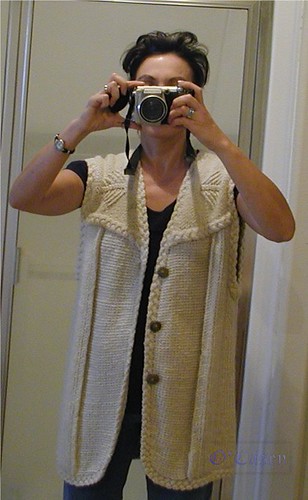
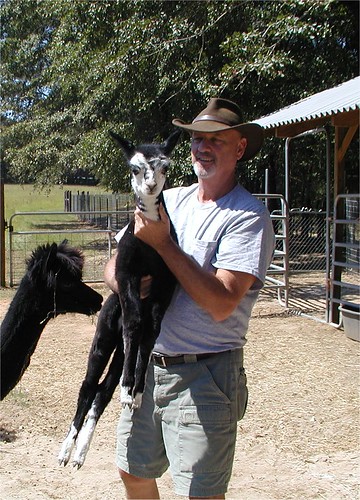
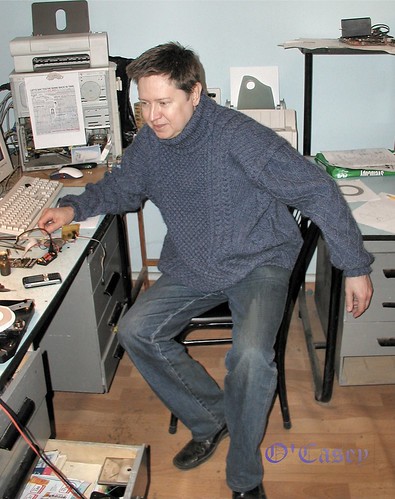
 This vest has been made especially for Ken, our friend and a Famous Alpaca Breeder. The yarn came from half a blanket of his alpaca named Quintessa. The color is natural Light Fown – non-bleached, non-dyed. I wanted to knit a Western-looking thing but with old Irish stitches as if somebody tried to tell about the West in Irish language. Made many sketches with lots of cables but when I saw and touched this beautiful silky, fine, gently twisted yarn all my plans changed and my task became more complicated: I had not only to tell in Irish about Western, but also to make this baby-soft- buttery-sweet-“oh-so-cute!” yarn look masculine, adult, sturdy, and coarse.
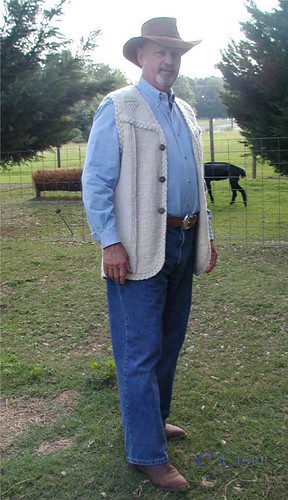

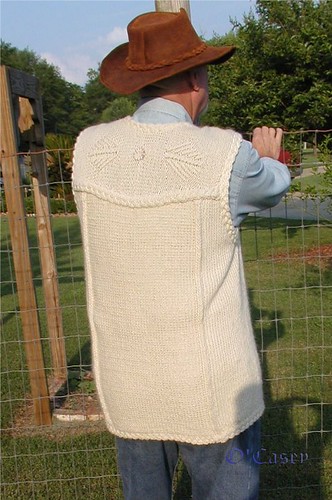
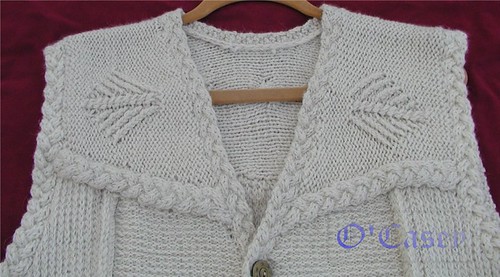
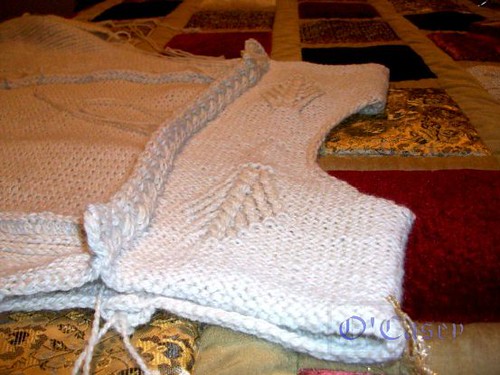
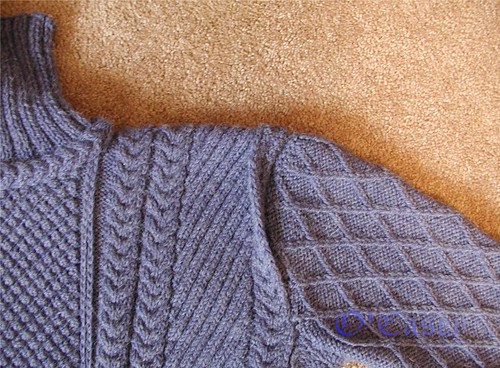
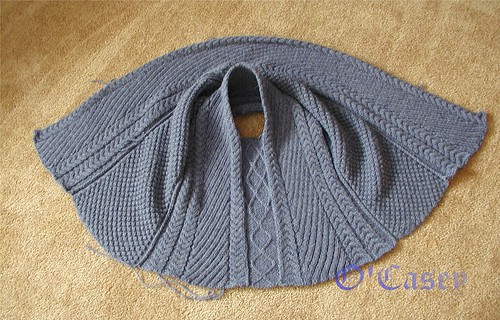
To choose the right texture was the most important thing here. That is why I made it quite simple, seams inside-out, with special stitch used on fine yarn that makes it look rougher than it really is. Only the yoke is a little bit intricate – actually the yoke is the most complicated thing is the whole vest. The ancient Irish “trees of life” are pictured on it – not vertically as usually we can see on old Irish sweaters but horizontally that makes them look “Westernish”, especially with a little mother-of-pearl ring attached in the middle of the back between the mirrored “trees”. The yoke is surrounded with simple braid knitted together with the yoke. The same braid that has been worked separately is used to trim the whole thing and the armholes.
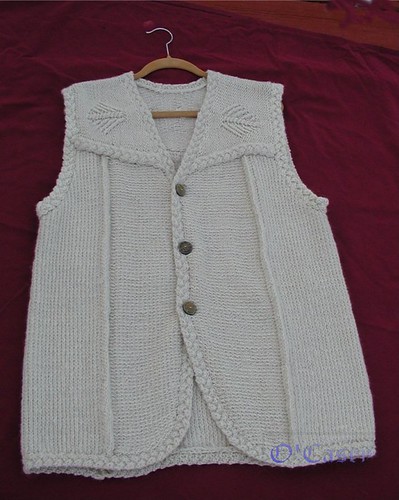
The vest doesn’t have side seams, but 2 front seams and 2 back seams. The body is assembled of 2 front panels, 2 side panels, and one back panel. All of them are knitted with the same basic stitch:
1 r.(wrong side) all purls
2r. (right side) 1 k., 1 slip the stitch from the left to the right needle.
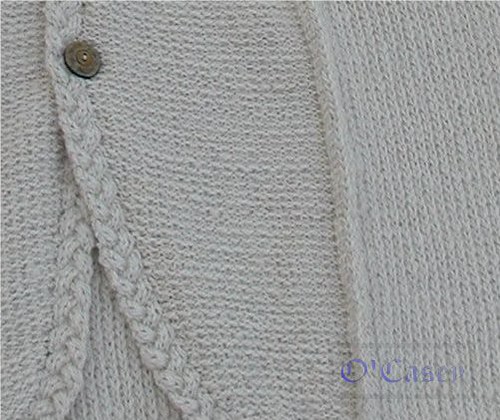
For the side panels the right side of this stitch is used, for the fronts and back – the wrong side. The seams are adorned with simple mirrored cables.
Materials: I used 1.66 lbs (750 g) of fine alpaca yarn, sport weight. Needles # 7 for the yoke and for the trimming braid (both worked in 2 strands) and #3 for the panels that are worked in 1 strand. Or the appropriate needles to obtain gauge.
Gauge for the yoke – 18 stitches in 4” (10cm) worked on simple knit.
Gauge for the panels – 28 stitches in 4” (10cm) worked on basic stitch.
3 mother-of-pearl or natural color buttons.
1 mother-of-pearl ring for the yoke back.
Size M-L.

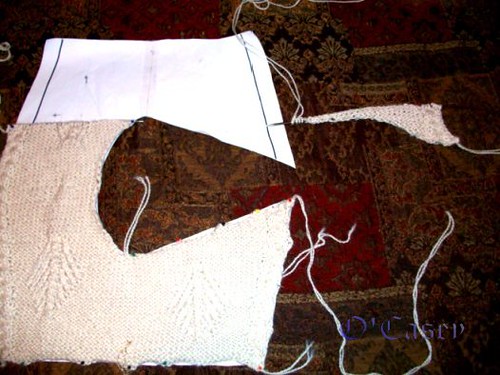
This is how the vest looks on the paper. The width of the braids is about 1” (2.5 cm). Only the braids that are worked together with yoke are shown on the picture. The braides worked separately are not included and not shown. They are absolutely separate and independent :-)
Copy the front and back pieces of the yoke on separate pieces of paper and assemble them together.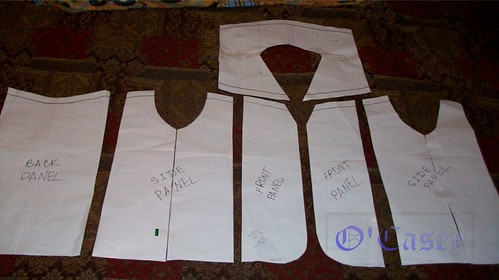
Important note: all the panels will be attached to the inner edge of yoke braids, and then the loose edge of the yoke braid will be sewn on top of them. In this way the braids will be reinforced and at the same time we will have nice “pipes” to hide the loose tread ends. Let’s don’t forget it when we knit the panels: they will be 1”(2.5 cm) longer because of these “under-braids”. When cutting the panels out of the paper, include these “under-braids” like I did on the picture above. Assemble the side panels out of 2 pieces, each of them will be knitted as one piece.
Note about selvage stitches: Always slip the first stitch in the beginning of each row and purl the last stitch in the end of each row. In such a way you will have a chain of selvage stitches, - one vertical loop for each 2 rows - on each side of a knitted piece. They will be used to simplify row count and later when assembling this particular vest, they will play an important role: because I use inside-out seams, they will form the nice rows on the right side of the sweater.
YOKE (2 strands of yarn, bigger needles)
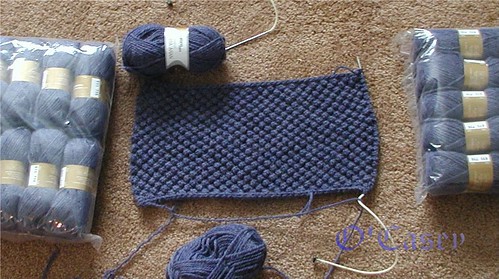
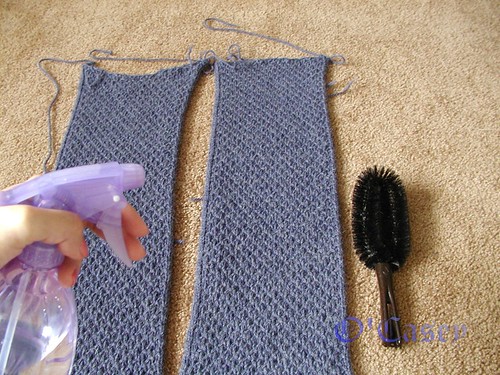
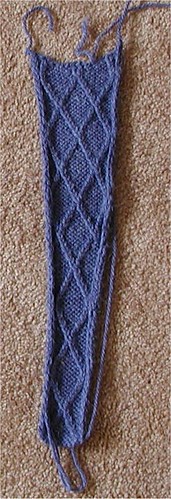
First of all I made a large swatch of 2 mirrored “trees of life” because:
– I had to rewrite the original “tree of life” upside down and to check it for errors;
– I love” trees of life” with twisted stitches, so I had to practice twisting them to the right and to the left.
Copy the front and back pieces of the yoke on separate pieces of paper and assemble them together.
Important note: all the panels will be attached to the inner edge of yoke braids, and then the loose edge of the yoke braid will be sewn on top of them. In this way the braids will be reinforced and at the same time we will have nice “pipes” to hide the loose tread ends. Let’s don’t forget it when we knit the panels: they will be 1”(2.5 cm) longer because of these “under-braids”. When cutting the panels out of the paper, include these “under-braids” like I did on the picture above. Assemble the side panels out of 2 pieces, each of them will be knitted as one piece.
Note about selvage stitches: Always slip the first stitch in the beginning of each row and purl the last stitch in the end of each row. In such a way you will have a chain of selvage stitches, - one vertical loop for each 2 rows - on each side of a knitted piece. They will be used to simplify row count and later when assembling this particular vest, they will play an important role: because I use inside-out seams, they will form the nice rows on the right side of the sweater.
YOKE (2 strands of yarn, bigger needles)
First of all I made a large swatch of 2 mirrored “trees of life” because:
– I had to rewrite the original “tree of life” upside down and to check it for errors;
– I love” trees of life” with twisted stitches, so I had to practice twisting them to the right and to the left.
 Stitch explanation:
## Left twist (center): slip 1 st onto a cable needle and hold it at front of the work, knit next 1 st from left-hand needle, then knit 1 st from the cable needle
** Left twist: slip 1 st onto a cable needle and hold it at front of the work, purl next 1 st from left-hand needle, then knit 1 st from the cable needle
^^ Right twist: slip 1 st onto a cable needle and hold it at back of the work, purl next 1 st from left-hand needle, then knit 1 st from the cable needle.
Upside down “tree of life” – it begins in the wrong row and is 14 sts wide.
1 (wrong row): 6 k, 2 p, 6k
2 (right row): 6 p, ##, 6 p
3 (w.r.) 4k, 1p, 1k, 2p, 1k, 1p, 4k
4 (r.r.) 4p, **, ##, ^^, 4p
5 (w.r.) 3k, 1p, 2k, 2p, 2k, 1p, 3k
6 (r.r.) 3p, **, 1p, ##, 1p, ^^, 3p
7 (w.r.) 2k, 1p, 1k, 1p, 1k, 2p, 1k, 1p, 1k, 1p, 2k
8 (r.r.) 2p, **, **, ##, ^^, ^^, 2p
9 (w.r.) 1k, 1p, 1k, 1p, 1k, 1p, 2p, 1p, 1k, 1p, 1k, 1p, 1k
10 (r.r.) 1k, **, **, 1p, ##, 1p, ^^, ^^, 1k
11 (w.r.) 1p, 1k, 1p, 1k, 2p, 1k, 1p, 1k, 1p, 1k, 1p
12 (r.r.) **, **, **, ##, ^^, ^^, ^^
13 (w.r.) 1k, 1p, 1k, 1p, 1k, 1p, 2p, 1p, 1k, 1p, 1k, 1p, 1k
14 (r.r.) 1p, **, **, 1p, ##, 1p, ^^, ^^, 1p
15 (w.r.) 2k, 1p, 1k, 1p, 1k, 2p, 1k, 1p, 1k, 1p, 2k
16 (r.r.) 2p, **, **, ##, ^^, ^^, 2p
17 (w.r.) 3k, 1p, 1k, 1p, 2p, 1p, 1k, 1p, 3k
18 (r.r.) 3p, **, 1p, ##, 1p, ^^, 3p
19 (w.r.) 4k, 1p, 1k, 2p, 1k, 1p, 4k
20 (r.r.) 4p, **, ##, ^^, 4p
21 (w.r.) 5k, 1p, 2p, 1p, 5k.
Ordinary “tree of life”- it begins in the right row and is 14 sts wide.
All the row on the wrong side - k the knit sts and p the purl sts.
1 (r.r) 4p, ^^, ##, **, 4p
3 (r.r) 3p, ^^, 1p, ##, 1p, **, 3p
5 (r.r) 2p, ^^, ^^, ##, **, **, 2p
7 (r.r) 1p, ^^, ^^, 1p, ##, 1p, ^^, ^^, 1p
9 (r.r) ^^, ^^, ^^, ##, ^^, ^^, ^^
11 (r.r) 1p, ^^, ^^, 1p, ##, 1p, ^^, ^^, 1p
13 (r.r) 2p, ^^, ^^, ##, ^^, ^^, 2p
15 (r.r) 3p, ^^, 1p, ##, 1p, ^^, 3p
17 (r.r) 4p, ^^, ##, ^^, 4p
19 (r.r) 6p, ##, 6p
20 (w.r) 6k, 2p, 6k
Braid 2x2x2 is very simple, it is worked on 6 stitches over 4 rows:
1 (r.r) slip 2 sts onto a cable needle and hold it at back of the work, knit next 2 st from left-hand needle, then knit 2 st from the cable needle; 2 k.
2 (w.r.) all p.
3(r.r) 2k, slip 2 sts onto a cable needle and hold it at front of the work, knit next 2 st from left-hand needle, then knit 2 st from the cable needle
4 (w.r.) all p.
Beginning: cast on 61 sts. First row (right side): 1selvage st, 6 braid sts, 47 reverse stocking stitches (all purl on the right side and all knit on the wrong side), 6 braid sts, 1 selvage sts. Mark the middle stitch (31). The front part of the yoke will lay to the right from this middle stitch, and the back part of the yoke – to the left.

The Yoke is a little complicated. I had to make notes on a scrap paper all the time to be sure what row I was on.
On each side right besides the braids increase 1 sts in every 6th row 4 times and work straight until the piece equals 28 rows. 69 stitches on the needles (61+4+4).
At the same time start an upside-down “trees of life” on the front in the 6-th row (wrong side) 13 sts to the right from the middle marked st.
At the same time start an upside-down “trees of life” on the back in the 14-th row (wrong side) 15 sts to the left from the middle marked st.
At that stage the piece will be divided in 2 parts: 35 for the back and 34 sts for the front.
Back piece: it will take us 21 rows to get to the center of the yoke back. On the neck side (right) decrease in the beginning of each row 2 sts 2 times and 1 sts 5 times. On the other side increase 1 st just close to the braid 2 times during these 21 rows. 28 sts on the needle (35-9+2). Mark the 21nd row. Repeat 20 rows in mirrored order starting at the same time in the right row ordinary “tree of life” at the same distance from 21st row as you finished the upside-down one. When 20 rows are done, temporary move all the stitches to a temporary pin or needle and forget about them for a while (but make a note what row of “tree of life” you are on).
Front triangle 1. 34 sts on a needle. In 18 rows we will decrease them to zero working the following way: on the neck side (left) decrease in the beginning of each row 5 sts 3 times, 4 sts 3 times and 3 sts 3 times. At the same time on the other side increase 1 st just close to the braid 2 times in the 2nd and 8th rows. It is important to make notes, especially in which row the “tree of life” ended.
Front triangle 2. We start it from scratch, casting on 3 sts. Then mirror Front triangle 1 starting the “tree of life” at the appropriate place.
When 18 rows are done we are ready to unite both parts of our yoke together and finish the piece, mirroring first 28 rows. If everything has been done correctly, we obtain the original 61 sts and happily cast them off. Celebrate!
After the yoke is done the panels will be a piece of cake, even a little boring.
SIDE PANELS. They are identical. Cast 87 stitches. First row (right side): 1 selvage st, 4 sts of cable 2 left (slip 2 sts onto a cable needle and hold it at front of the work, knit next 2 sts from left-hand needle, then knit 2 sts from the cable needle), 1 p., 75 sts of the basic stitch(1 knit, 1 slip), 1p.,4 sts of cable 2 right (slip 2 sts onto a cable needle and hold it at back of the work, knit next 2 sts from left-hand needle, then knit 2 sts from the cable needle), 1 selvage st. Work in this way until the piece measure 72 selvage sts, twisting the little side cables every right side row. Mark this row at both sides. Then bind off the middle 10 sts. Decrease on every other row 5, 3, 2 sts one time and 1 st 13 times and continue to work until the piece measures 23 selvage sts from the marked row (72+23=95 selvage sts). 95 will be the length of all our panel seams. Then, starting at the seam side (not arm-hole!), cast off the equal groups of the rest 20-21 sts 3 times in the beginning of each right row. In the same way finish the opposite side of the piece, make sure that the length of the panel seam is 95 sts.
The decreasing and casting off can be fudged a little bit, but 95 is important.
BACK PANEL. Also large, easy and annoying. Cast on 87 stitches. First row (wrong side): 1 selvage st, cable 2 left, 77 purl sts of the basic stitch (its wrong side will be used for the back panel), cable 2 right, 1 selvage st. Work in this way until the piece measure 92 selvage sts, twisting the little cables every right side row. Mark this row at both sides. Then bind off the middle 25 sts. Cast off the equal groups of the rest 30-31 sts 3 times at the beginning of each right side row. In the same way finish the opposite side of the piece, make sure that the length of the panel seams is 92+3=95 sts. The decreasing and casting off can be fudged a little bit, but 95 is important.
FRONT PANELS:
Right panel. Cast on 20 sts. First row: 1 selvage st, 14 purl sts of the basic stitch (its wrong side is used for the front panels), 4 sts of cable 2 right, 1 selvage st. Then at the beginning of the each right side row add 5 sts, 3 sts, 2 sts 1 time and 1 st 4 times (34 sts total on the needle). Then add 1 st at the beginning of every 4th row 9 times. 43 sts on the needle. Knit straight until the piece measure 75 selvage sts (at the cable side), twisting the little cables every right side row. Mark this row at both sides. Then decrease 10 sts in the next 32 rows (16 selvage sts) at the side opposite to the cable. Cast off the equal groups of the rest 23 sts 4 times at the beginning of each right side row. Make sure that the length of the panel seam is 75+16+4=95 sts. The decreasing and casting off can be fudged a little bit, but 95 is important.
Left panel is mirroring the Right Front panel.
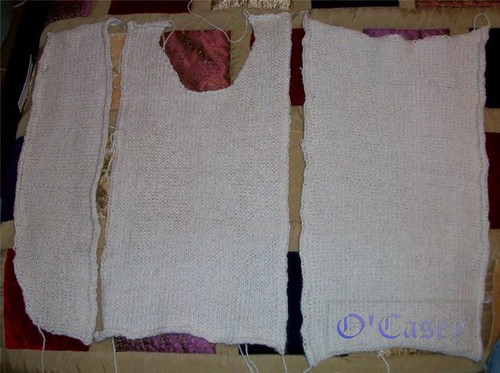
ASSEMBLING: Iron lightly all the parts (yoke – the wrong sides) separately through wet cotton cloth, don’t press, let them rest until fully dry. The yoke may appear a little bit smaller than the paper yoke, it’s OK. The panels may appear a little larger than the paper panels, especially at the cabled edges, it’s fine. Sewing together will straighten them out.
Assemble all the panels together with mattress seam that is greatly shown here.
When making ordinary mattress seam we sew on the right side and obtain the seam visible only on the wrong side. In our case, to make an inside-out mattress seam we work on the wrong side of the sweater and from time to time admire the chains of selvage sts that show off on the right side. Start in the bottom of the panels and proceed towards the yoke. If some little mistake occurred and the numbers of selvage sts do not perfectly match and you don’t want to re-knit the details – fudge the mistakes at the top, not in the bottom where they are very visible. The yoke braid will hide them very well. Sew loose, make these decorative seams as stretchy as possible and checking the seam often making sure that they are as stretchy as the knitted material.
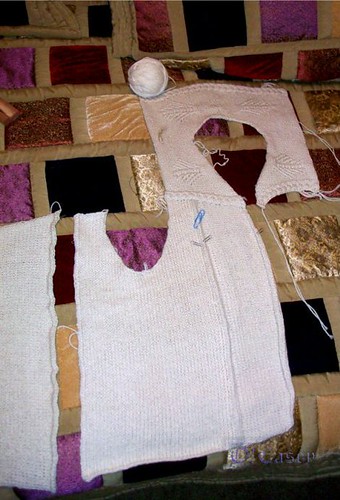

Attach the body to the yoke, sewing the panels not to the loose edge of the braid, but to the inner edge. Sew the loose end of the braid on top of the panels. Hide all the thread ends into the braid “pipe”.
Braid for the bodice: 1) cast 7 stitches (larger needles, 2 strands!) and work until braid is about 260 selvage stitch long. Make selvage stitches only on one side, they will be used to attach the braid to the vest.
2) 2 braids made in the same way for the armholes, each 70 selvage stitch long.
Trimming. Mark the position of 3 buttons on the left front and don’t forget not to sew the braid to the front in these spots: buttonholes. I trimmed the vest with the braid with regular mattress seam, starting somewhere at the bottom side panel, easing in the braid on the rounded parts of the front and easing in the vest along the neckline and armholes. It took me several times before I made it right. So, it is useful to leave a long piece of yarn after making a trimming braid to be able to adjust its length in the end.
Sew on 3 buttons to the right front panel and a decorative ring at the back of the yoke (optional).
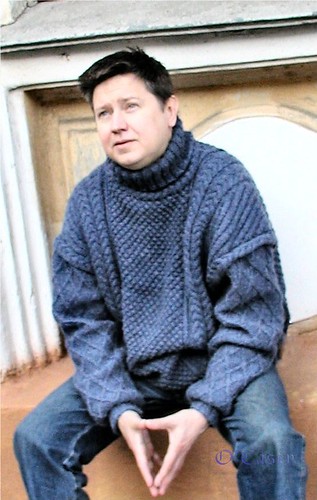
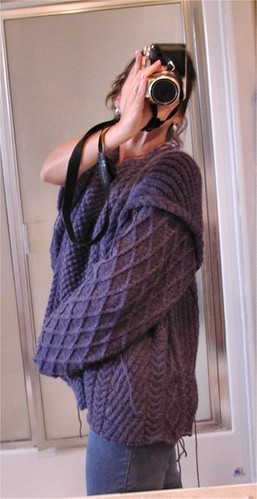
Doesn't it look good on me?
2) 2 braids made in the same way for the armholes, each 70 selvage stitch long.
Trimming. Mark the position of 3 buttons on the left front and don’t forget not to sew the braid to the front in these spots: buttonholes. I trimmed the vest with the braid with regular mattress seam, starting somewhere at the bottom side panel, easing in the braid on the rounded parts of the front and easing in the vest along the neckline and armholes. It took me several times before I made it right. So, it is useful to leave a long piece of yarn after making a trimming braid to be able to adjust its length in the end.
Sew on 3 buttons to the right front panel and a decorative ring at the back of the yoke (optional).
Doesn't it look good on me?


