


My first (but not the last!) experiment with ethnic style. I was not sure about anything when I was making it… I was not even sure I would show it. But Kostik, my nephew, is wearing the vest with such ease like he had been born with it. Actually it was the biggest surprise to me that this thing can look so nice and casual in real life, on the street. As always, I made lots of shots, and then I had the hardest time to pick the best – I liked all of them. Kostik is a historian and a teacher – not a model at all, but he was so graceful and self composed and so much himself as if it were the most obvious thing for him – being constantly photographed on the street and in the city park for more than an hour – with lots of curious people around.
Before making this vest I looked through several encyclopedias and Ukrainian embroidery resources – just for the insight, I didn’t want to mimic anything. Of course, the main source of insight was Kostik himself.
The front of the vest is made with angle knitting (just like famous “Baby Surprise Jacket” by Elizabeth Zimmermann. BTW, Kostik was so cute as a baby! :-)). The back is composed of 2 details – the yoke with patterned band and arrow stitch and the body. They overlap (upper part of the body goes under the horizontal patterned yoke band). The body or the back is eased in a little bit.
The vest is trimmed with patterned light brown band which is made separately, and finished with white cable reverse stockinet border.
 Size M-L.
Materials:
14 balls of “Sock It to Me 4 Ply” yarn, each ball 50g (1.75 oz) 229 yards (209 meters) - Cream color and almost 6 balls of the same yarn – Latte color (light brown). Double strand knitting.
Needles: number 6 or to obtain gauge – 18 sts in 4” (10 cm).
Note about selvage stitches (ss): Always slip the first stitch in the beginning of each row and purl the last stitch in the end of each row. In such a way you will have a chain of selvage stitches, - one vertical loop for each 2 rows - on each side of a knitted piece. I usually don’t count rows, I count selvage stitches. Another advantage – they look very nice when assembled by mattress stitch.
The most part of the vest is done with reverse stockinet.
Stitch patterns:
Pattern 1 (Trident) 28 stitches x 24 rows

Stitch Key
Stockinet Stitch: Knit 1 (k) on right side rows, purl 1 (p) on wrong side rows.
Reverse Stockinet Stitch: Purl 1 on right side rows, knit 1 on wrong side rows.
t2b: Slip next stitch onto cable needle, hold at back of work. Knit the next stitch, purl the stitch on the cable needle.
t2f: Slip next stitch onto cable needle, hold at front of work. Purl 1, knit the stitch on the cable needle.
c2b: Slip next stitch onto cable needle, hold at back of work. Knit the next stitch, knit the stitch from the cable needle.
c2f: Slip next stitch onto cable needle, hold at front of work. Knit 1, knit the stitch on the cable needle.
Row 1 (Right Side): p5, c2b, c2f, p10, c2b, c2f, p5.
Row 2 (Wrong Side): k5, p4, k10, p4, k5.
Row 3: p4, t2b, k2, t2f, p8, t2b, k2, t2f, p4.
Row 4: k4, p1, k1, p2, k1, p1, k8, p1, k1, p2, k1, p1, k4.
Row 5: p3, c2b, p1, k2, p1, c2f, p6, c2b, p1, k2, p1, c2f, p3.
Row 6: k3, [p2, k1] 2 times, p2, k6, [p2, k1] 2 times, p2, k3.
Row 7: p2, t2b, k1, p1, k2, p1, k1, t2f, p4, t2b, k1, p1, k2, p1, k1, t2f, p2.
Row 8: k2, [p1, k1] 2 times, p2, [k1, p1] 2 times, k4, [p1, k1] 2 times, p2, [k1, p1] 2 times, k2.
Row 9: p1, c2b, p1, k1, p1, k2, p1, k1, p1, c2f, p2, c2b, p1, k1, p1, k2, p1, k1, p1, c2f, p1.
Row 10: k1, [p2, k1, p1, k1] 2 times, p2, k2, [p2, k1, p1, k1] 2 times, p2, k1.
Row 11: t2b, [k1, p1] 2 times, k2, [p1, k1] 2 times, t2f, t2b, [k1, p1] 2 times, k2, [p1, k1] 2 times, t2f.
Row 12: p1, [k1, p1] 2 times, k1, [p2, k1, p1, k1, p1, k1] 3 times, p1.
Row 13: k1, [p1, k1] 2 times, t2b, t2f, [k1, p1] 2 times, k2, [p1, k1] 2 times, t2b, t2f, [k1, p1] 2 times, k1.
Row 14: p1, k1, p1, k1, p2, k2, [p2, k1, p1, k1] 2 times, p2, k2, p2, [k1, p1] 2 times.
Row 15: k1, p1, k1, p1, t2b, p2, t2f, p1, k1, p1, k2, p1, k1, p1, t2b, p2, t2f, [p1, k1] 2 times.
Row 16: p1, [k1, p1] 2 times, k4, [p1, k1] 2 times, p2, [k1, p1] 2 times, k4, [p1, k1] 2 times, p1.
Row 17: k1, p1, k1, t2b, p4, t2f, k1, p1, k2, p1, k1, t2b, p4, t2f, k1, p1, k1.
Row 18: p1, k1, p2, k6, [p2, k1] 2 times, p2, k6, p2, k1, p1.
Row 19: k1, p1, t2b, p6, t2f, p1, k2, p1, t2b, p6, t2f, p1, k1.
Row 20: p1, k1, p1, k8, p1, k1, p2, k1, p1, k8, p1, k1, p1.
Row 21: k1, t2b, p8, t2f, k2, t2b, p8, t2f, k1.
Row 22: p2, k10, p4, k10, p2.
Row 23: t2b, p10, t2f, t2b, p10, t2f.
Row 24: p1, k12, p2, k12, p1.
Pattern 2 (Arrow) - 14 stitches x 32 rows
Stitch Key
Stockinet Stitch: Knit 1 (k) on right side rows, purl 1 (p) on wrong side rows.
Reverse Stockinet Stitch: Purl 1 on right side rows, knit 1 on wrong side rows.
c2b: Slip next stitch onto cable needle, hold at back of work. Knit the next stitch, knit the stitch from the cable needle.
c2f: Slip next stitch onto cable needle, hold at front of work. Knit 1, knit the stitch on the cable needle.
t2b: Slip next stitch onto cable needle, hold at back of work. Knit the next stitch, purl the stitch on the cable needle.
t2f: Slip next stitch onto cable needle, hold at front of work. Purl 1, knit the stitch on the cable needle.
Row 1 (Right Side): p5, c2b, c2f, p5.
Row 2 (Wrong Side): k5, p4, k5.
Row 3: p4, t2b, k2, t2f, p4.
Row 4: k4, p1, k1, p2, k1, p1, k4.
Row 5: p3, c2b, p1, k2, p1, c2f, p3.
Row 6: k3, [p2, k1] 2 times, p2, k3.
Row 7: p2, t2b, k1, p1, k2, p1, k1, t2f, p2.
Row 8: k2, [p1, k1] 2 times, p2, [k1, p1] 2 times, k2.
Row 9: p1, c2b, p1, k1, p1, k2, p1, k1, p1, c2f, p1.
Row 10: k1, [p2, k1, p1, k1] 2 times, p2, k1.
Row 11: t2b, [k1, p1] 2 times, k2, [p1, k1] 2 times, t2f.
Row 12: p1, [k1, p1] 2 times, k1, p2, [k1, p1] 3 times.
Row 13: k1, [p1, k1] 2 times, p1, k2, [p1, k1] 3 times.
Row 14: p1, [k1, p1] 2 times, k1, p2, [k1, p1] 3 times.
Row 15: k1, [p1, k1] 2 times, p1, k2, [p1, k1] 3 times.
Row 16: p1, [k1, p1] 2 times, k1, p2, [k1, p1] 3 times.
Row 17: k1, [p1, k1] 2 times, p1, k2, [p1, k1] 3 times.
Row 18: p1, [k1, p1] 2 times, k1, p2, [k1, p1] 3 times.
Row 19: k1, [p1, k1] 2 times, t2b, t2f, [k1, p1] 2 times, k1.
Row 20: p1, k1, p1, k1, p2, k2, p2, [k1, p1] 2 times.
Row 21: k1, p1, k1, p1, t2b, p2, t2f, [p1, k1] 2 times.
Row 22: p1, [k1, p1] 2 times, k4, [p1, k1] 2 times, p1.
Row 23: k1, p1, k1, t2b, p4, t2f, k1, p1, k1.
Row 24: p1, k1, p2, k6, p2, k1, p1.
Row 25: k1, p1, t2b, p6, t2f, p1, k1.
Row 26: p1, k1, p1, k8, p1, k1, p1.
Row 27: k1, t2b, p8, t2f, k1.
Row 28: p2, k10, p2.
Row 29: t2b, p10, t2f.
Row 30: p1, k12, p1.
Row 31: p14.
Row 32: k14.
Pattern 3 - 16 stitches x 16 rows

Stitch Key
k: Knit 1.
p: Purl 1.
c2b: Slip next stitch onto cable needle, hold at back of work. Knit the next stitch, knit the stitch from the cable needle.
c2f: Slip next stitch onto cable needle, hold at front of work. Knit 1, knit the stitch on the cable needle.
t3b: Slip next stitch to cable needle, hold at back of work. Knit 2, purl the stitch on the cable needle.
t3f: Slip next 2 stitches onto cable needle, hold at front of work. Purl 1, knit the stitches on the cable needle.
c4f: Slip next 2 stitches onto cable needle, hold at front of work. Knit 2, knit the stitches on the cable needle.
Row 1 (Right Side): c2b, p3, c4f, p3, c2b, p2.
Row 2 (Wrong Side): k2, p2, k3, p4, k3, p2.
Row 3: c2f, p3, k4, p3, c2f, p2.
Row 4: k2, p2, k3, p4, k3, p2.
Row 5: c2b, p3, c4f, p3, c2b, p2.
Row 6: k2, p2, k3, p4, k3, p2.
Row 7: c2f, p2, t3b, t3f, p2, c2f, p2.
Row 8: k2, [p2, k2] 3 times, p2.
Row 9: c2b, p1, t3b, p2, t3f, p1, c2b, p2.
Row 10: k2, p2, k1, p2, k4, p2, k1, p2.
Row 11: c2f, p1, k2, p4, k2, p1, c2f, p2.
Row 12: k2, p2, k1, p2, k4, p2, k1, p2.
Row 13: c2b, p1, t3f, p2, t3b, p1, c2b, p2.
Row 14: k2, [p2, k2] 3 times, p2.
Row 15: c2f, p2, t3f, t3b, p2, c2f, p2.
Row 16: k2, p2, k3, p4, k3, p2.
LEFT FRONT
Cast on 127 sts (46 sts – horizontal side, 1 central stitch (mark it with colorful yarn, on both sides of this stitch we will decrease stitches, that will create the angle), and 80 sts of vertical side).


1st row (wrong side, we start with vertical side): 1k, 79 k., 1 p. (central st), 45 k., 1 ss.
2nd row (right side): 1 ss, 43 p., 2 p. together, I k. (central stitch), p. together, 77 p., ss
3rd row: like 1st row but on both sides of the center stitch knit 2 sts together,
4th row: on the both sides of the central st don’t decrease sts. And continue in this way, don’t decrease sts by the central st in every 3rd row to the very end of the piece. This is also the first row of the Trident (pattern 1). Don’t forget that the pattern starts with 5 purls.
5th row: as established and according to the pattern.
Beginning with 6th row, we start to shape the neckline. In the next 36 rows we should add 27 sts in the end of s following: 12 times – 1 st, 4 times – 2 sts, 1 time – 3 sts, and 1 time, all in the end of each right side row. Then work 7 rows straight and bind off.
Make the right half symmetrical to the left one.
BACK

Cast on 119 sts: 1ss, 1 p., 28 sts of pattern 1, 1p., 28 sts of pattern 1, 1p. 28 sts of pattern 1, 1 p., 28 sts of pattern 1, 1p., 1 ss. Work 48 rows.
Bind off in the beginning of every row 5 sts 2 times, 3 sts 2 times, 2 st 2 times, and then 1 st 6 times. Bind all the stitches off .
Yoke


Cast on 78 sts: 1 ss, 1p., 14 sts of pattern 3, 2 p., 14 sts of pattern 2 (start the arrow not immediately but in the row 3), 46 sts of reverse stockinette. Work straight 6 rows.
Then in the beginning of each wrong row bind off 2 sts 1 time, 1 st. 21 times, and work 6 rows straight (56 rows total). This is half of the yoke. Then work straight 6 more rows, increase in the beginning of each wrong row 1 st. 21 times and 2 sts 1 time.
Work straight 6 rows and bind off.
ASSEMBLY 1
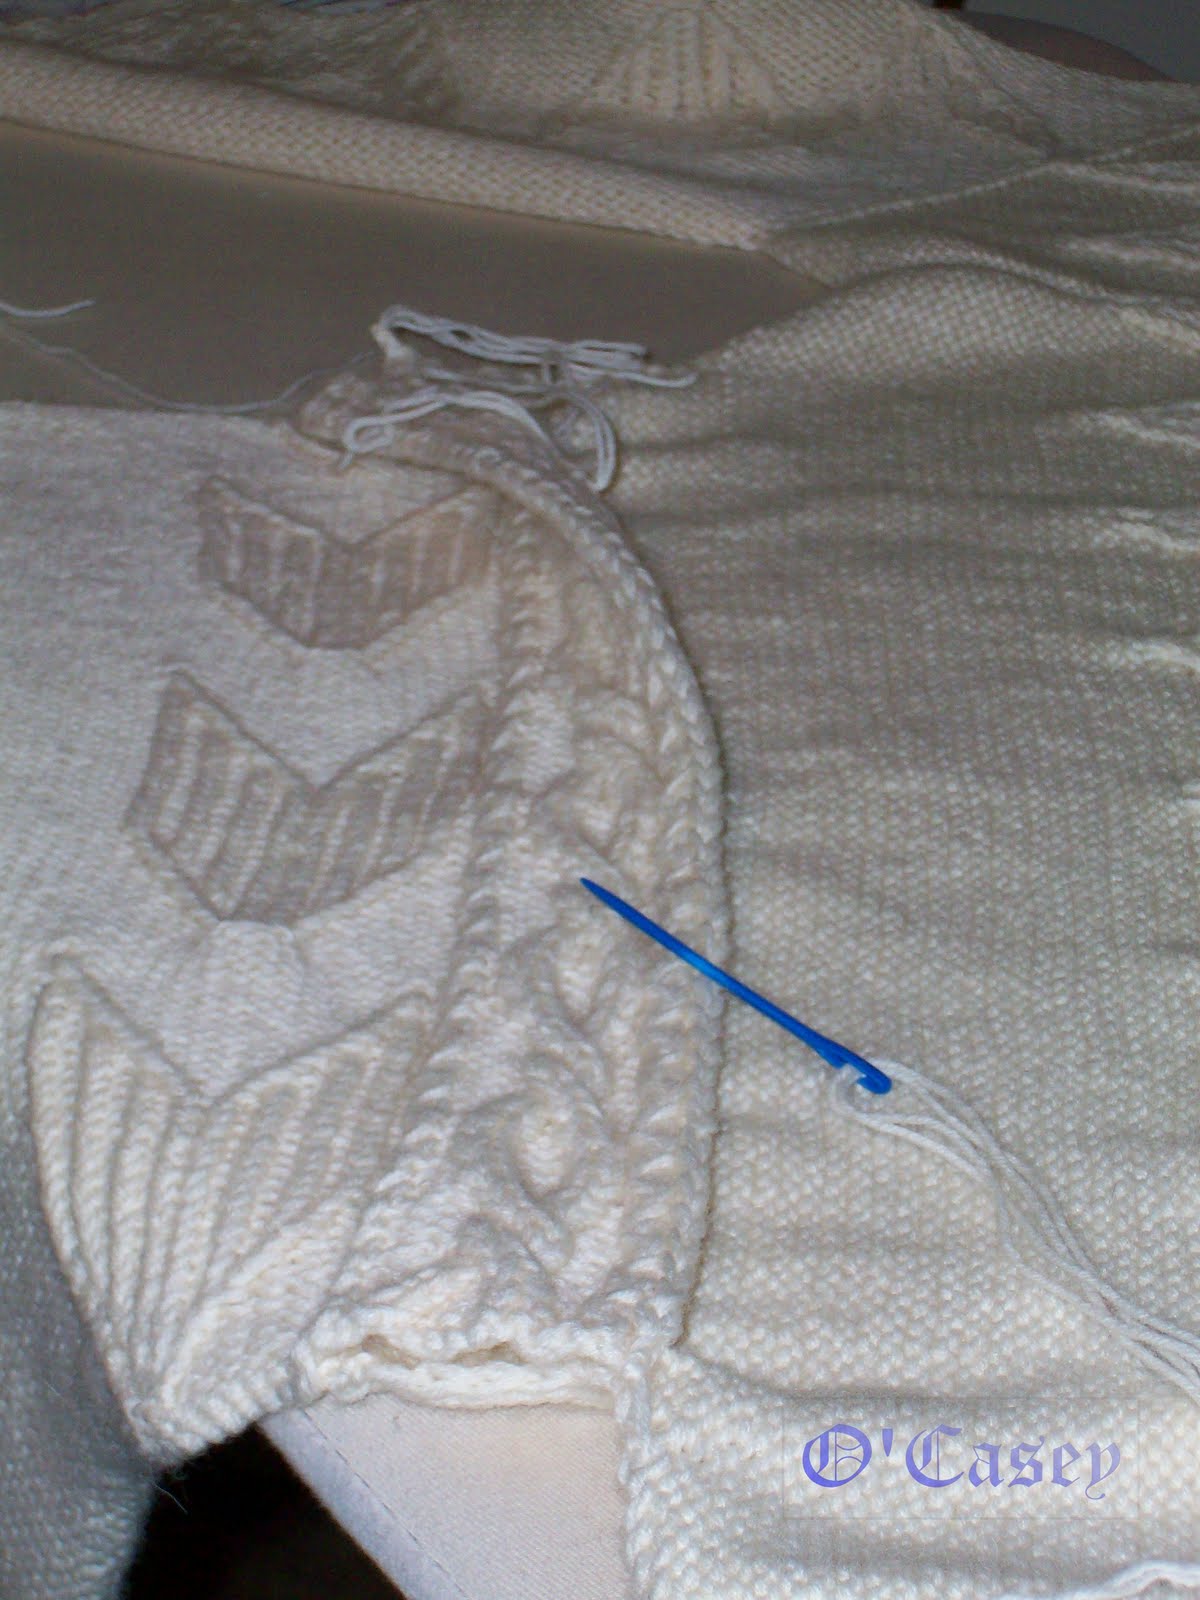
Assemble the back with 2 seams overlapping the yoke over the back and easing off the back at the same time (see picture). Make shoulder and side seams.
BROWN TRIM

Brown trim consists of 6 separate pieces:
– Long straight horizontal bottom piece (19)
– 2 straight front vertical pieces (7 full big “O”s)
– 1 rounded piece around the neck (10 full big “O”s)
– 2 straight armhole pieces (10 full big “O”s).
For the bottom piece cast on 2 sts and work pattern 3 adding at the same time 16 sts during 28 rows from one side and immediately incorporating them into the pattern. Follow the pattern but omit the row with the twist. When all the sts are added on, make the first twist, and then continue straight following the pattern without omissions. The piece should contain 19 full big “O”s and 2 open ones in the beginning and in the end (see photo). In the end of a piece decrease the sts absolutely the same way as you added them in the beginning (16 sts during 28 rows). The stitches should be decreased at the same side of the stripe as the increasing.
Start the same way the front piece, work 7 full “O”s, but decrease the stitches faster: 16 sts during 16 rows (1 st per row), this end will be attached to the neck trim. The stitches should be decreased at the same side of the stripe as the increasing.
Make another front trim symmetrical (not identical!) to the first one.

For the rounded neck trim cast on 2 sts and add 16 sts from one side during 16 rows (so that this strip matches the front one). Work 10 big “O”s and decrease the stitches in the same way, in every row from one side, the stripe should be symmetrical. What makes it rounded are the short rows. 5 groups of 4 short rows are supposed to be made between 1 and 2, 3 and 4, 5 and 6, 7 and 8, 9 and 10 big “O”s.
To make a short row, *work the row not to the very end but only 14 sts. Slide the next st to the right needle, bring yarn to front between needles, slide stitch back to the left needle, and turn the work, work to the end of the row”. 3 more times repeat * *. The side of the piece where the wrapped stitch is located will be shorter than the opposite one, this is what makes the piece to form a curve.
Armhole piece: cast on 18 sts and work 15 rows following pattern 3 without twists. Then make a twist, 10 big “O”s, and finish with 15 rows without twist. Bind off.
Attach all the light-brown trim to the vest. Overlap them on the arm holes as shown on the pictures.


WHITE CABLE BORDER
All the vest is trimmed with one long cable border. 2 separate pieces are made for the arm holes.
Cast on 16 sts: 1 selvage stitch, 5 sts knitted for garter stitch (all k) and 10 purl sts for the reverse stockinet cable (always knit the edge st of the cable, both on the right and of the wrong side).
In each 13th row make a twist: slip next 5 stitches onto cable needle, hold at front of work. Knit 5, knit the stitches on the cable needle.
All the white cable border is made with a single piece the beginning of which will be attached close to the left side seam, in the bottom. To turn the corners of the vest, the short rows will be used again. Each corner will be attached to a twist. So, just before and after a corner twist a group of 3 short rows will be made: in the wrong side row just preceding the twist and on the wrong side row just after the twist.
So, start the border, make the first twist not on the 13th, but at 7th row. Continue to work the piece, 7 more twists. Twist number 9 will be attached to the corner, so make groups of short rows just before and after the twist.
Make 13 more twists, and treat the next one with the groups of short rows – this is the corner by the neck.
Make 13 more twists, and treat with the short rows another corner of the neckline.
Make 13 more twists and treat the next one with short rows.
Make 22 more twists, work about 6 rows and bind off.
Cable border for the sleeves: Cast on 16 sts, work 10 rows, make a twist, continue to work 14 nore twists, work 10 rows, and bind off. Attach to the armhole overlapping as shown on the pictures.
Attach the border cable to the vest. First baste the corners, then attach the band with a mattress seam, andswe together the short sides of the band.


Attach 4 toggle buttons at the twist spots. There is no need for special holes on the opposite side, the cable twists form the holes that can be used to button the vest.


14 comments:
Оля, ты не устаеш, меня порожать!!! как красиво... сколько фантазии, умничка ты!
Ада, не мешай, я в процессе... :-) Еше кучу картинок надо выложить. Целую
Оля, поразительная вещь! Увидев название "Украинская песня", не смогла пройти мимо :). Но когда рассмотрела, насколько этот жилет сложный в задумке, какое количество деталей и все они гармонично на своем месте, выражаю восхищение Мастеру! Кра-со-та! :)
Инна. Zhukin на Раве. :)
...все, больше не мешаю :)))
This is one of the most beautiful fiber art pieces I have seen in a long time! The finished garment is museum quality. I love your impeccable detail in documenting your planning, techniques, stitch patterns, and construction details. Brilliant photographs! This is Gold Medal knitting! Thank you.
Оля, цитата из тебя:
"ОООО, какой роскошный!!! Ну почему не я его придумала?!"
Целую
Алла
What a beautiful poetry of stitches, O'Casey! My compliment for this inspiring design and such detailed work - both the vest and the pattern.
Now I know, what did you need pointed buttons for. :-)) They indeed look perfect on Ukrainian Song.
Looking forward to your next works, best, Snjezana
Wow! What a great job! Love it!
I happen to be Ukrainian, but more than that, I'm a 50 year knitter who is blown away with this vest! The design, the attention to detail, the knitting is just beautiful and amazing. I have never written a comment before, but when I read that you were not sure you would even show this, my heart stopped! Looking at this is really a joy.
Beautiful work!
Hello,
I wonder if someone can help me.
I am new to 'blogging' and don't know really what to do.
I saw the Ukrainian Song Waistcoat on the internet today and would really like to knit this for my husband, I thought it was wonderful.
I tried to print the pattern and pges from the internet but don't seem to be able to do that.
Could someone please tell me how to do that, or alternatively, could you please tell me where I can buy the pattern from.
Any information will be really appreciated.
Many thanks
Angela
Sorry, I'm not a blogger at all and I do not know exactly how to post and moderate comments.
But the only way to get this FREE pattern - this is to highlight it and print selected.
hi, new to the site, thanks.
Ok, this is a MUST HAVE for me! I LOVE the UNIQUE and BEAUTIFUL design and detail of this! You made Doodledaddy a very happy guy, AGAIN! THANK YOU for sharing!
Post a Comment